Film scanning with Sony mirrorless and Adobe Camera Raw
I’ve been shooting film for a few years now, and scanning/digitizing it myself almost as long. Here’s a guide to how I do it. This is mostly for slide film but should apply to any types of film.
Equipment
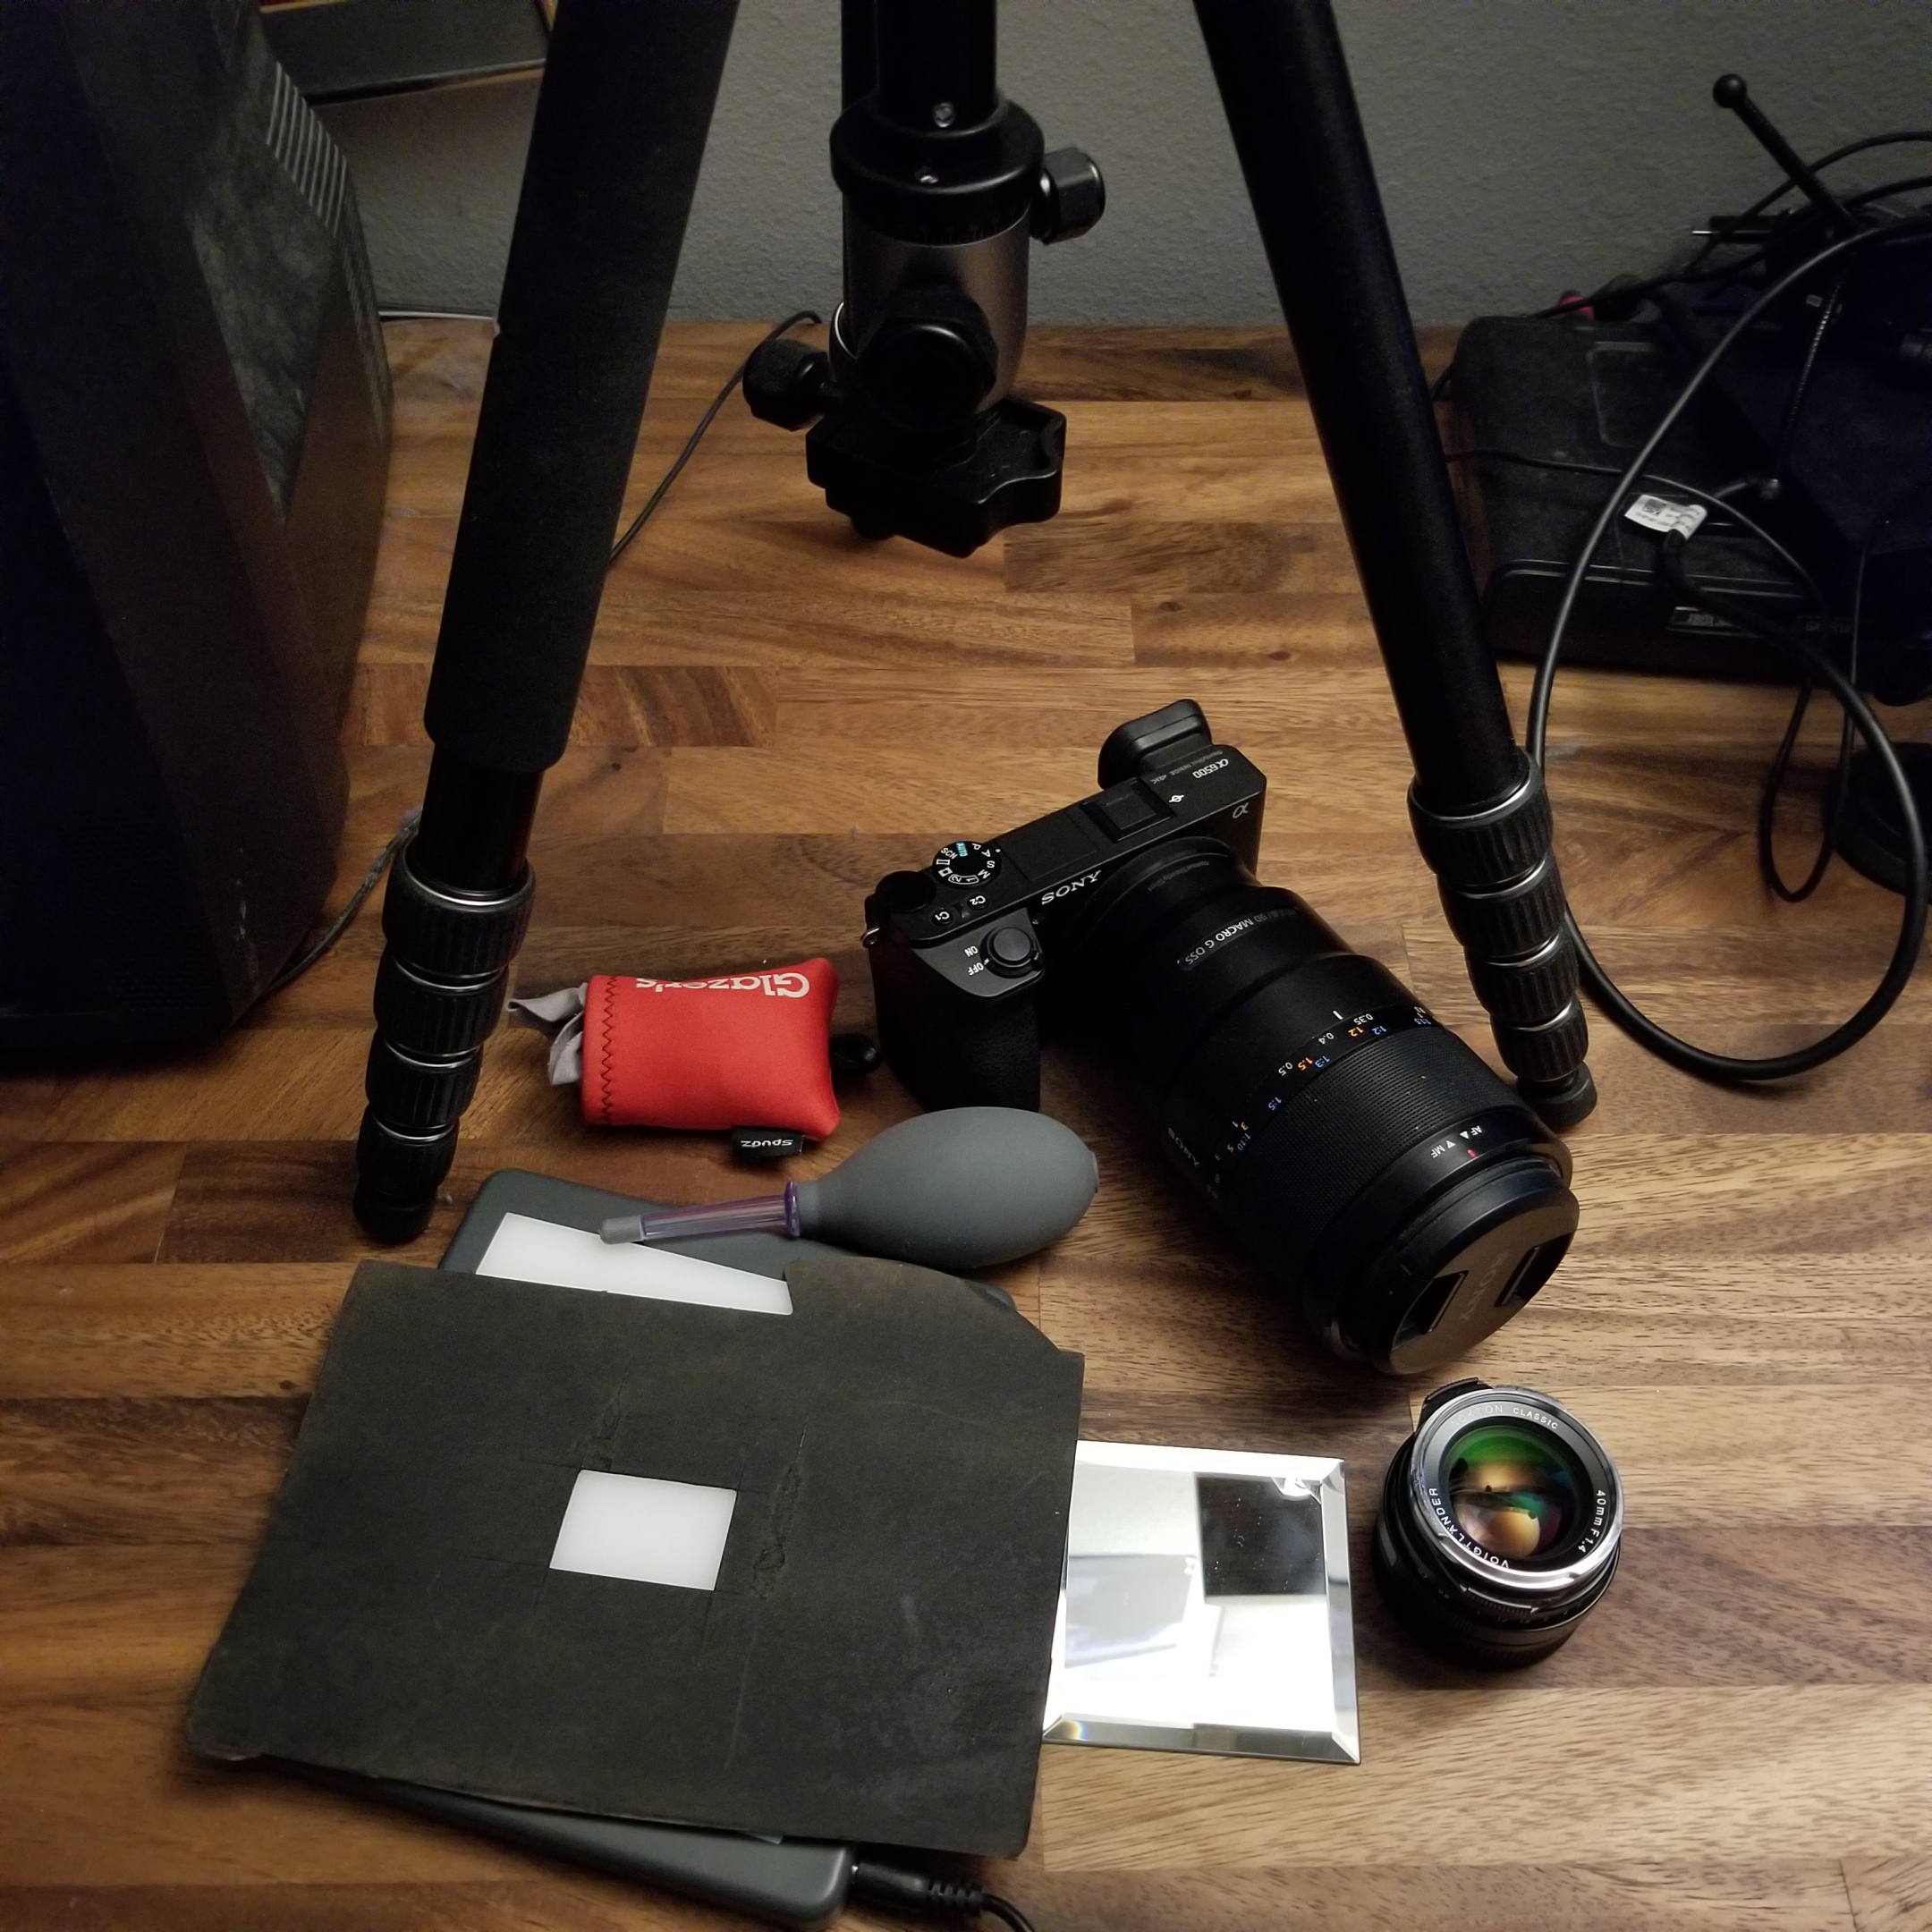
- Mirrorless or DSLR camera. I use a Sony alpha α6500, basically any digital camera will work.
- Macro lens. Don’t bother with old manual focus lenses or normal lenses with an extension tube. Personally I worked out that a real macro lens would pay for itself in lab fees before I even finished shooting the film in my freezer. Buy a proper lens and you’ll never regret it.
- Tripod, best if you can flip it and put the neck on the bottom to be closer to the film.
- A mask to keep light from leaking around from your film. Any sort of black cardboard or stock paper will work, with a hole cut slightly larger than the film you want to scan. In this case it’s actually a side of a beer case spray painted black.
- A small mirror, I have this one.
- Light pad. Don’t bother with cheap solutions like your smartphone or something, a real light source is cheap and much better. I have the Logan Electric 4x5”.
- Loupe for viewing. If you have a fast normal lens like a 50mm f/1.8 you can simply turn it around and point the film end at your slide. It’s free and way sharper than any loupe. If you’re using a DSLR lens you may need to hold the aperture pin open. Counter-intuitively wider angle lenses have more magnification, my 12mm f/2 can see right down to the grain on Velvia 50.
- Cleaning supplies for dust. Any cheap air puffer and microfiber cloth will work but they’re not strictly required.
- USB cable to connect your camera to your PC. I’m using Sony Imaging Edge Desktop, your particular camera brand probably makes a similar application.
- Many people recommend anti-Newton’s rings glass, but I’ve found glass to be unnecessary, just get some heavy things to hold down the film at the corners. I use bits of zinc I got from melted pennies but any small heavy things should work.
- Raw image processing program. I’m using Adobe Photoshop CS3 here, which is ancient. Photoshop generally only supports cameras made before the release date. However, Adobe makes a program called Adobe Digital Negative Converter which will convert any raw files into a generic DNG format that any version of Photoshop can open.
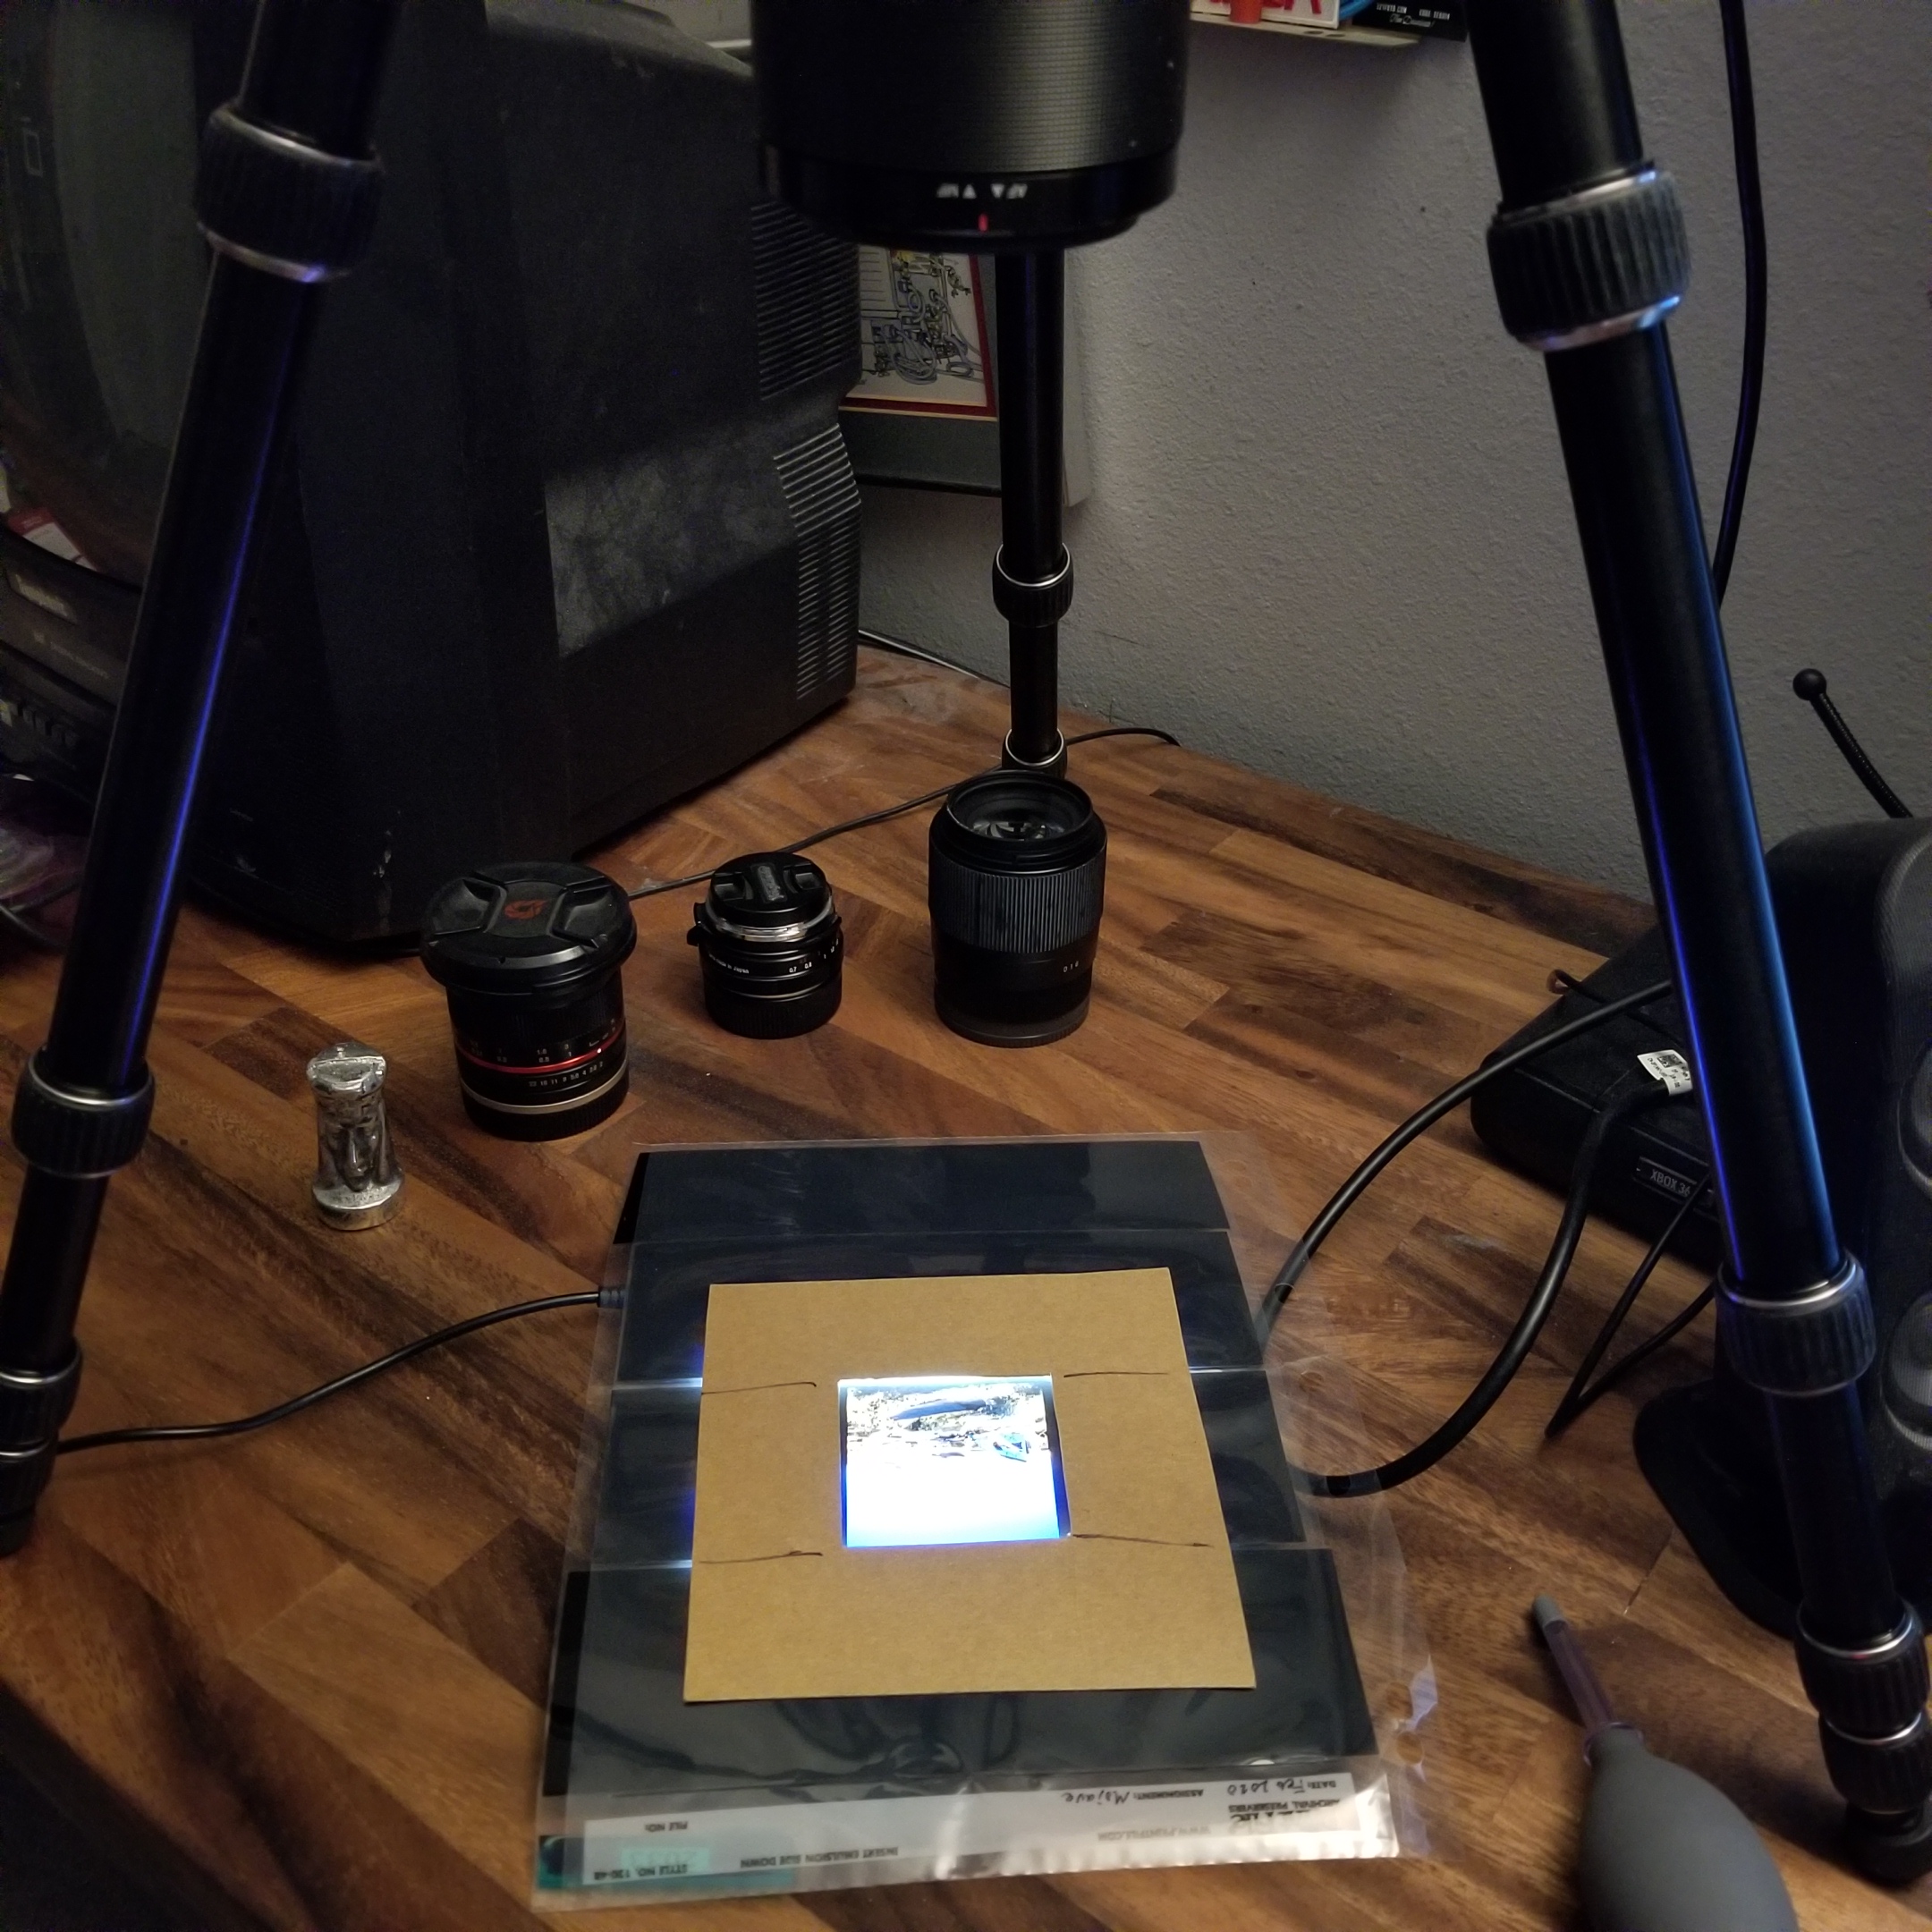
Distance
You’ll need to start by setting your camera at the right distance from the film. Point it at the film and raise/lower the tripod until it fills the frame. For 6x6 like I have here it will be square, for 135 it should fill the whole frame. Since this is approximate you can leave the film in the sleeve. If you can turn on grid lines on your PC app this can help here. Your film should go between the light pad and the dark mask.
Alignment
To make sure everything is in focus, you need to have your camera perfectly parallel to the film. An easy trick for this is what the mirror is for. Place the mirror on your light pad and align your camera so the reflection of the lens is exactly centered. A grid helps here too. You may need to do several iterations of distance and centering to get everything perfect. Once it’s set up though you don’t need to touch it unless you change film formats (e.g. 135 to 120).

White balance
You’ll need to calibrate your camera for the backlight you’re using. Take your film out and shoot a picture of just the backlight.

Here I’ve placed several color samplers across the diagonal. Set the white balance temperature and tint so the red, green, and blue are equal (pure white). Also set your lens corrections so the lens falloff is compensated for (brightness is equal across the frame). Depending on your lens you may not able to fully compensate for the falloff. You can also do this by looking at the color histogram in the upper right, get the peak as narrow as possible and eliminate the color fringes.
Exposure settings
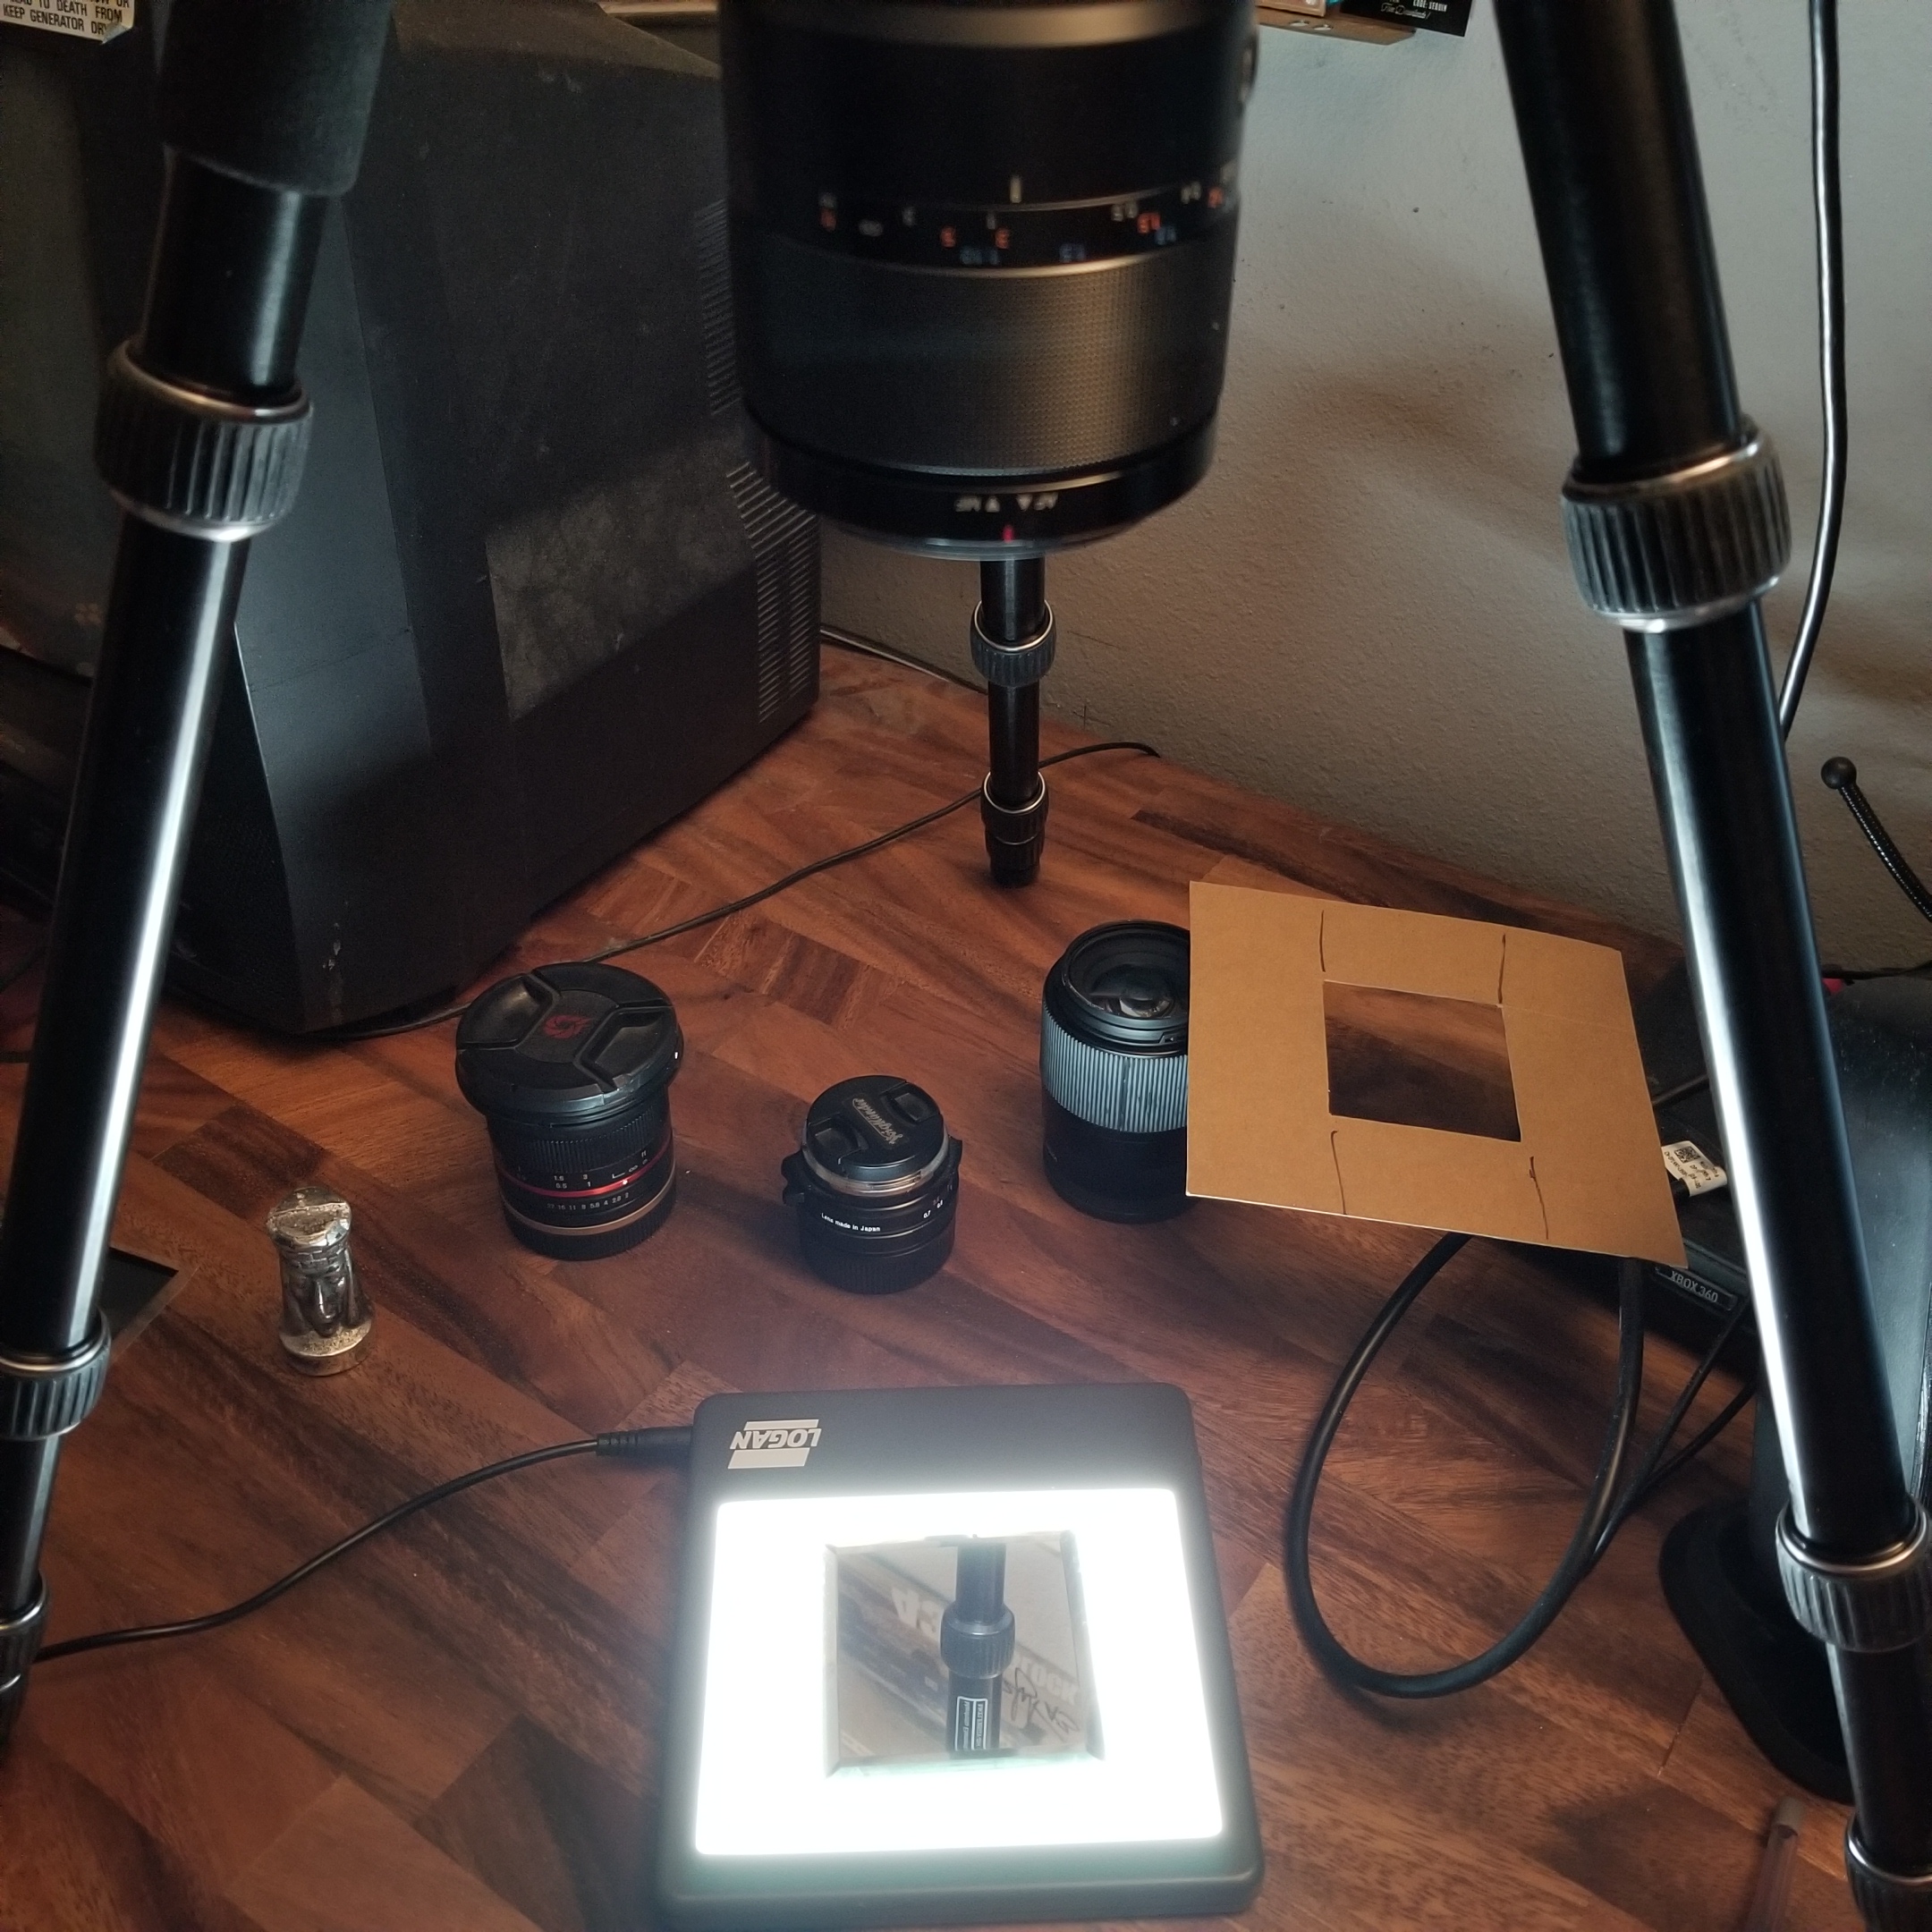
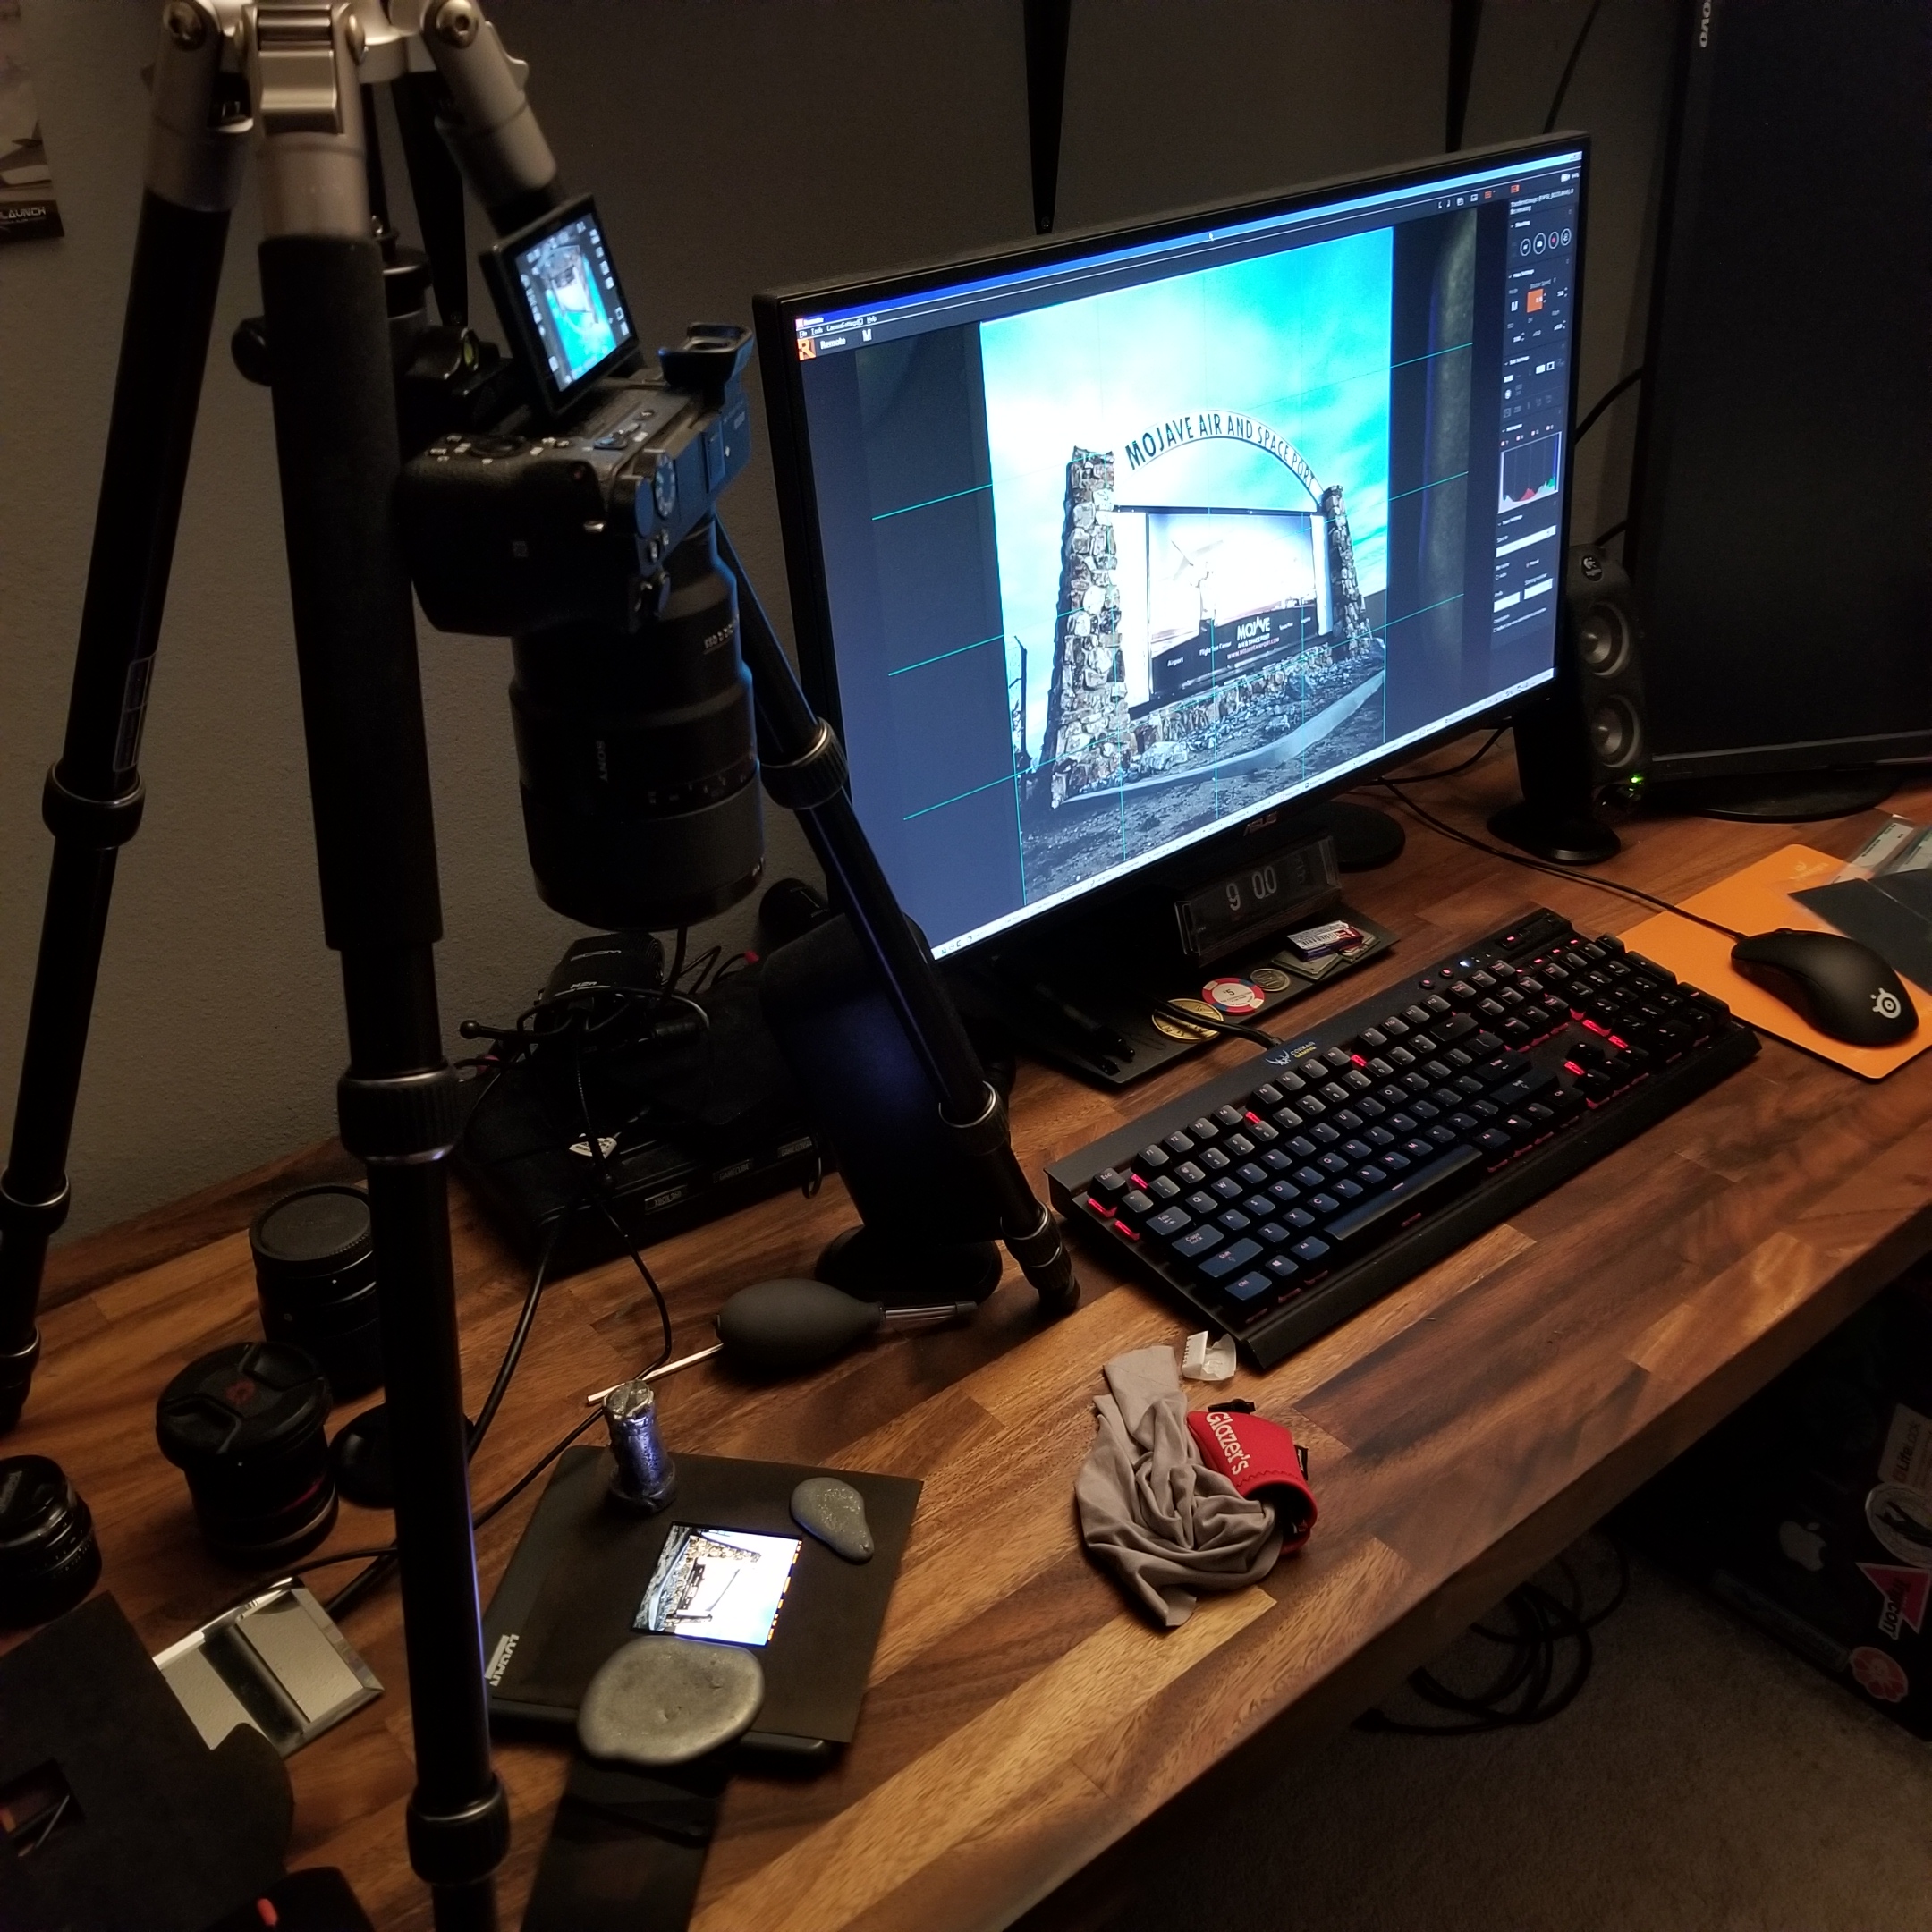
Put your film in, and hold it down with the mask and whatever you’re using for weight.
Your setup probably looks something like this:
For exposure settings, use the lowest base ISO your camera supports (probably ISO 100). Avoid any trick ‘pulled’ ISOs.
When it comes to aperture, shoot several test shots and see what looks best. You’ll have to balance sharper apertures with diffraction softness. Here’s a spread at f/2.8, f/4, f/5.6, etc. from the center of the frame.
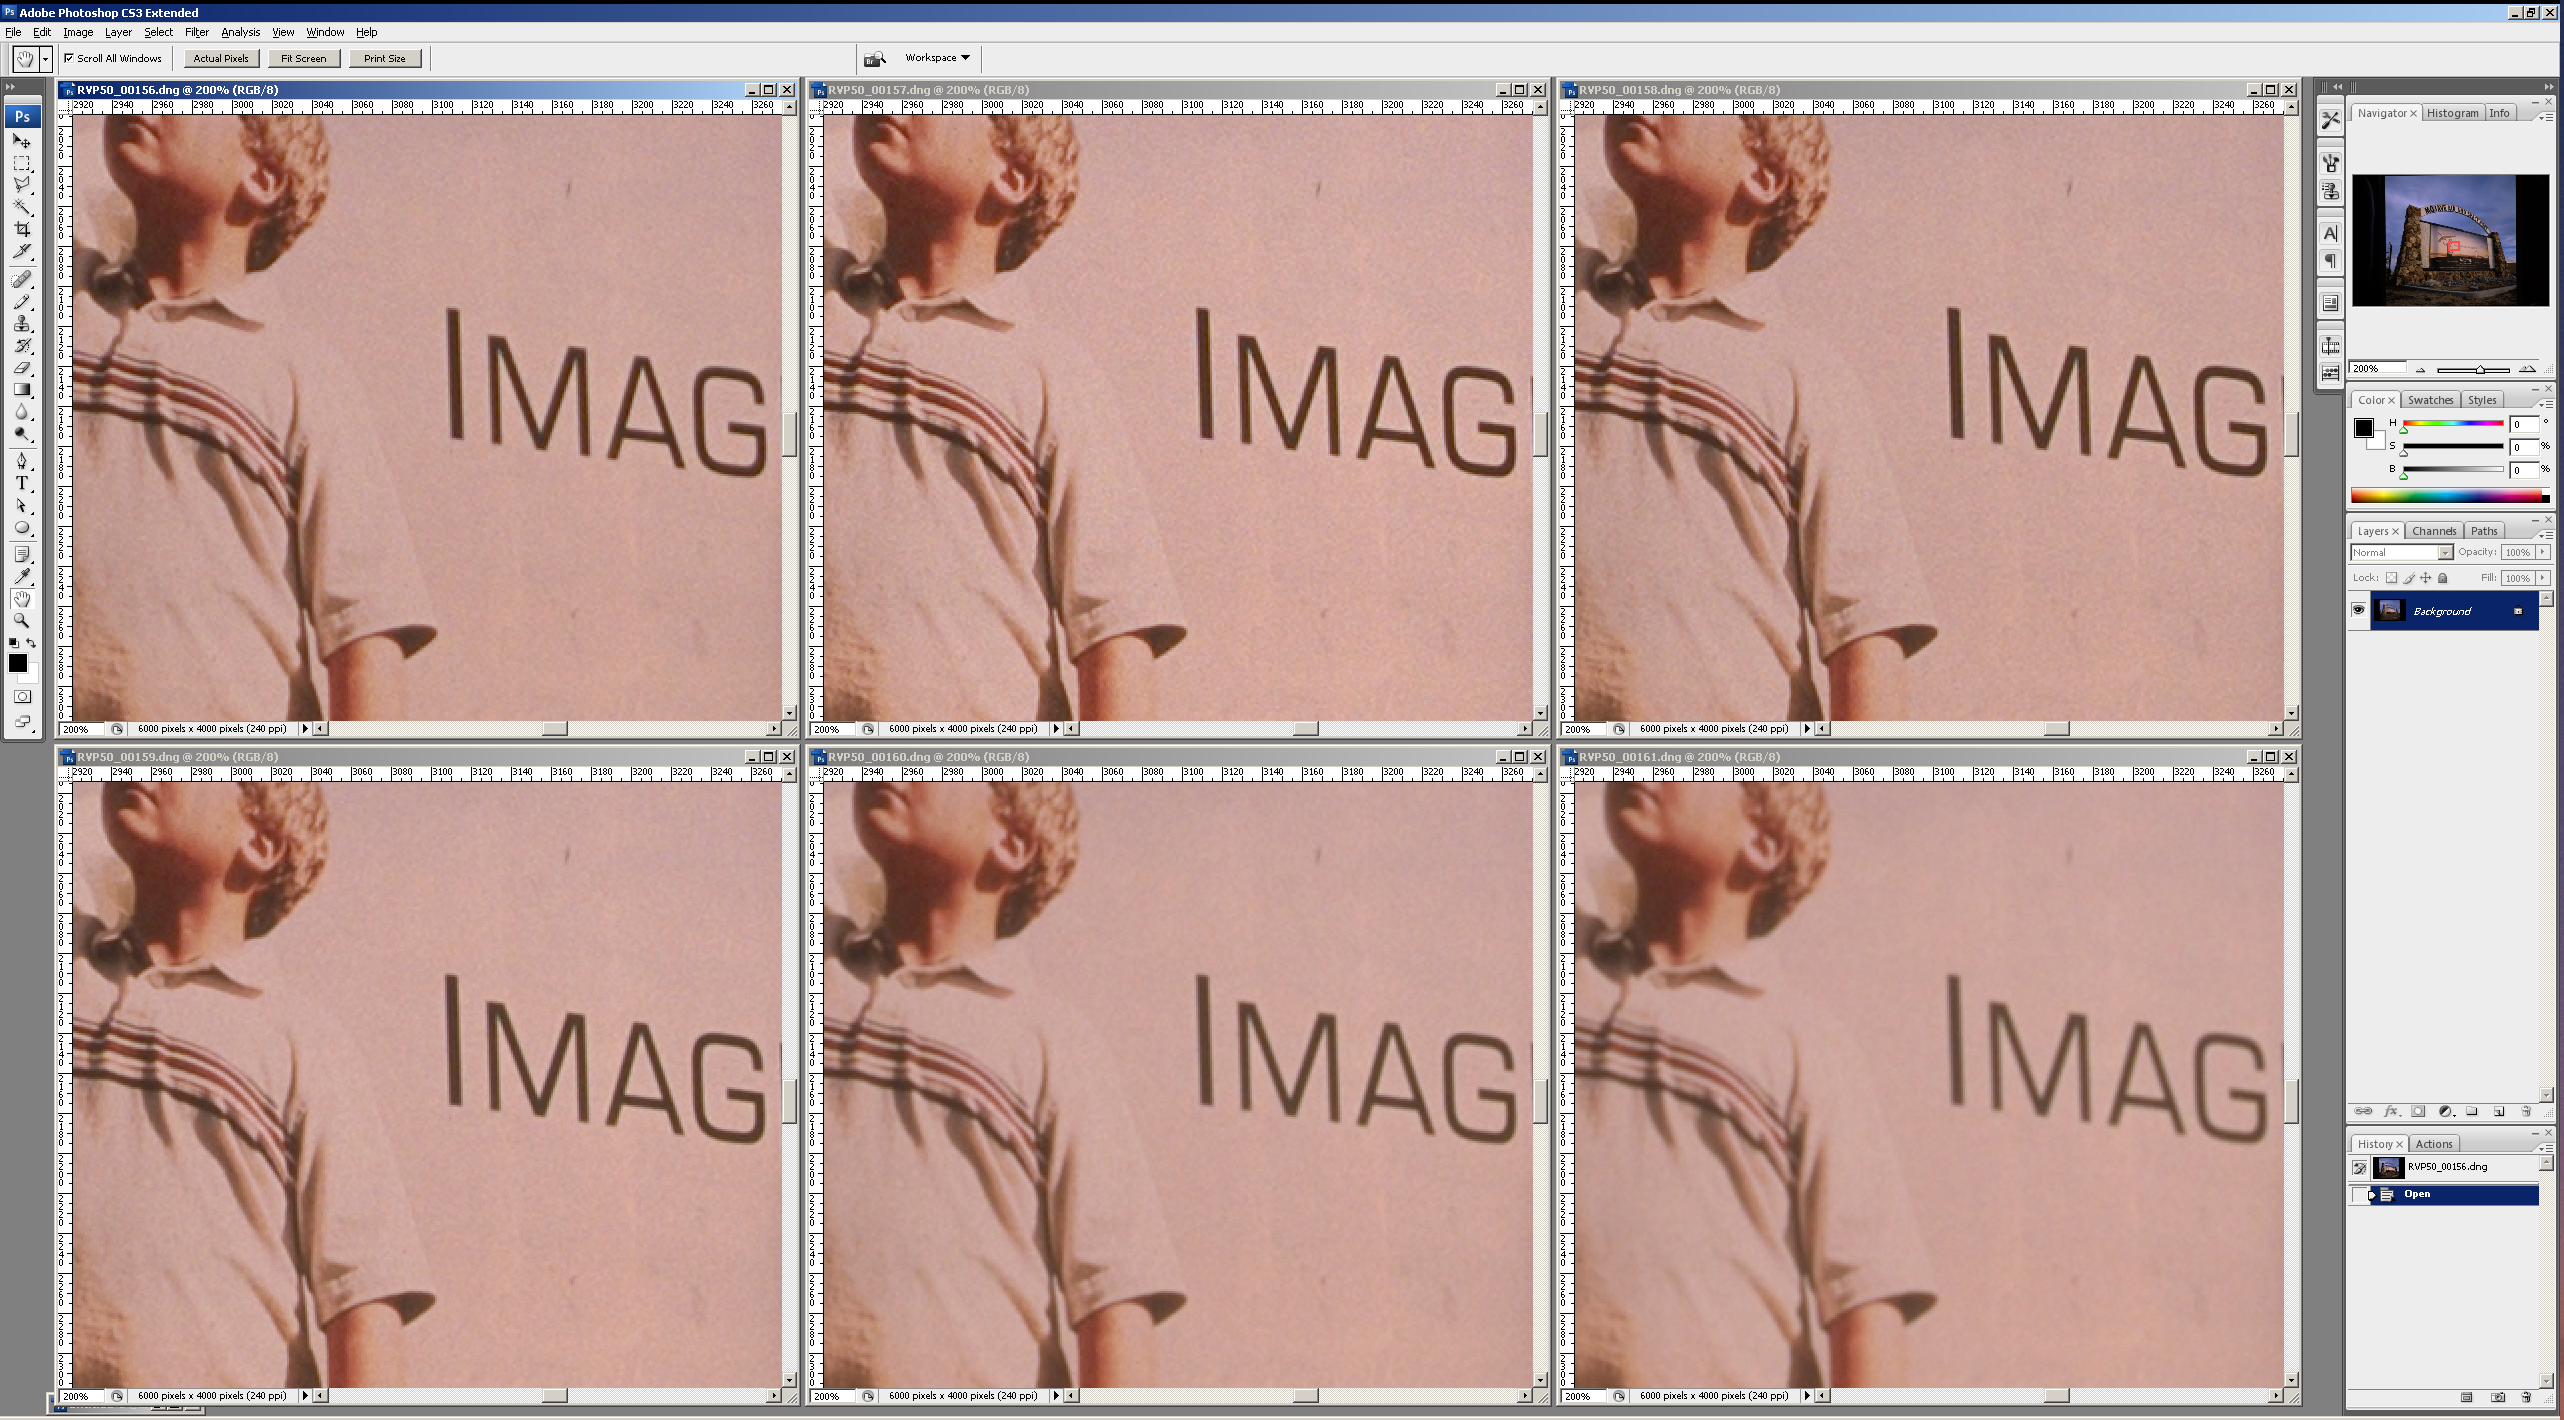
It’s hard to say but either f/5.6 or f/8 looks the best, here’s the corner:
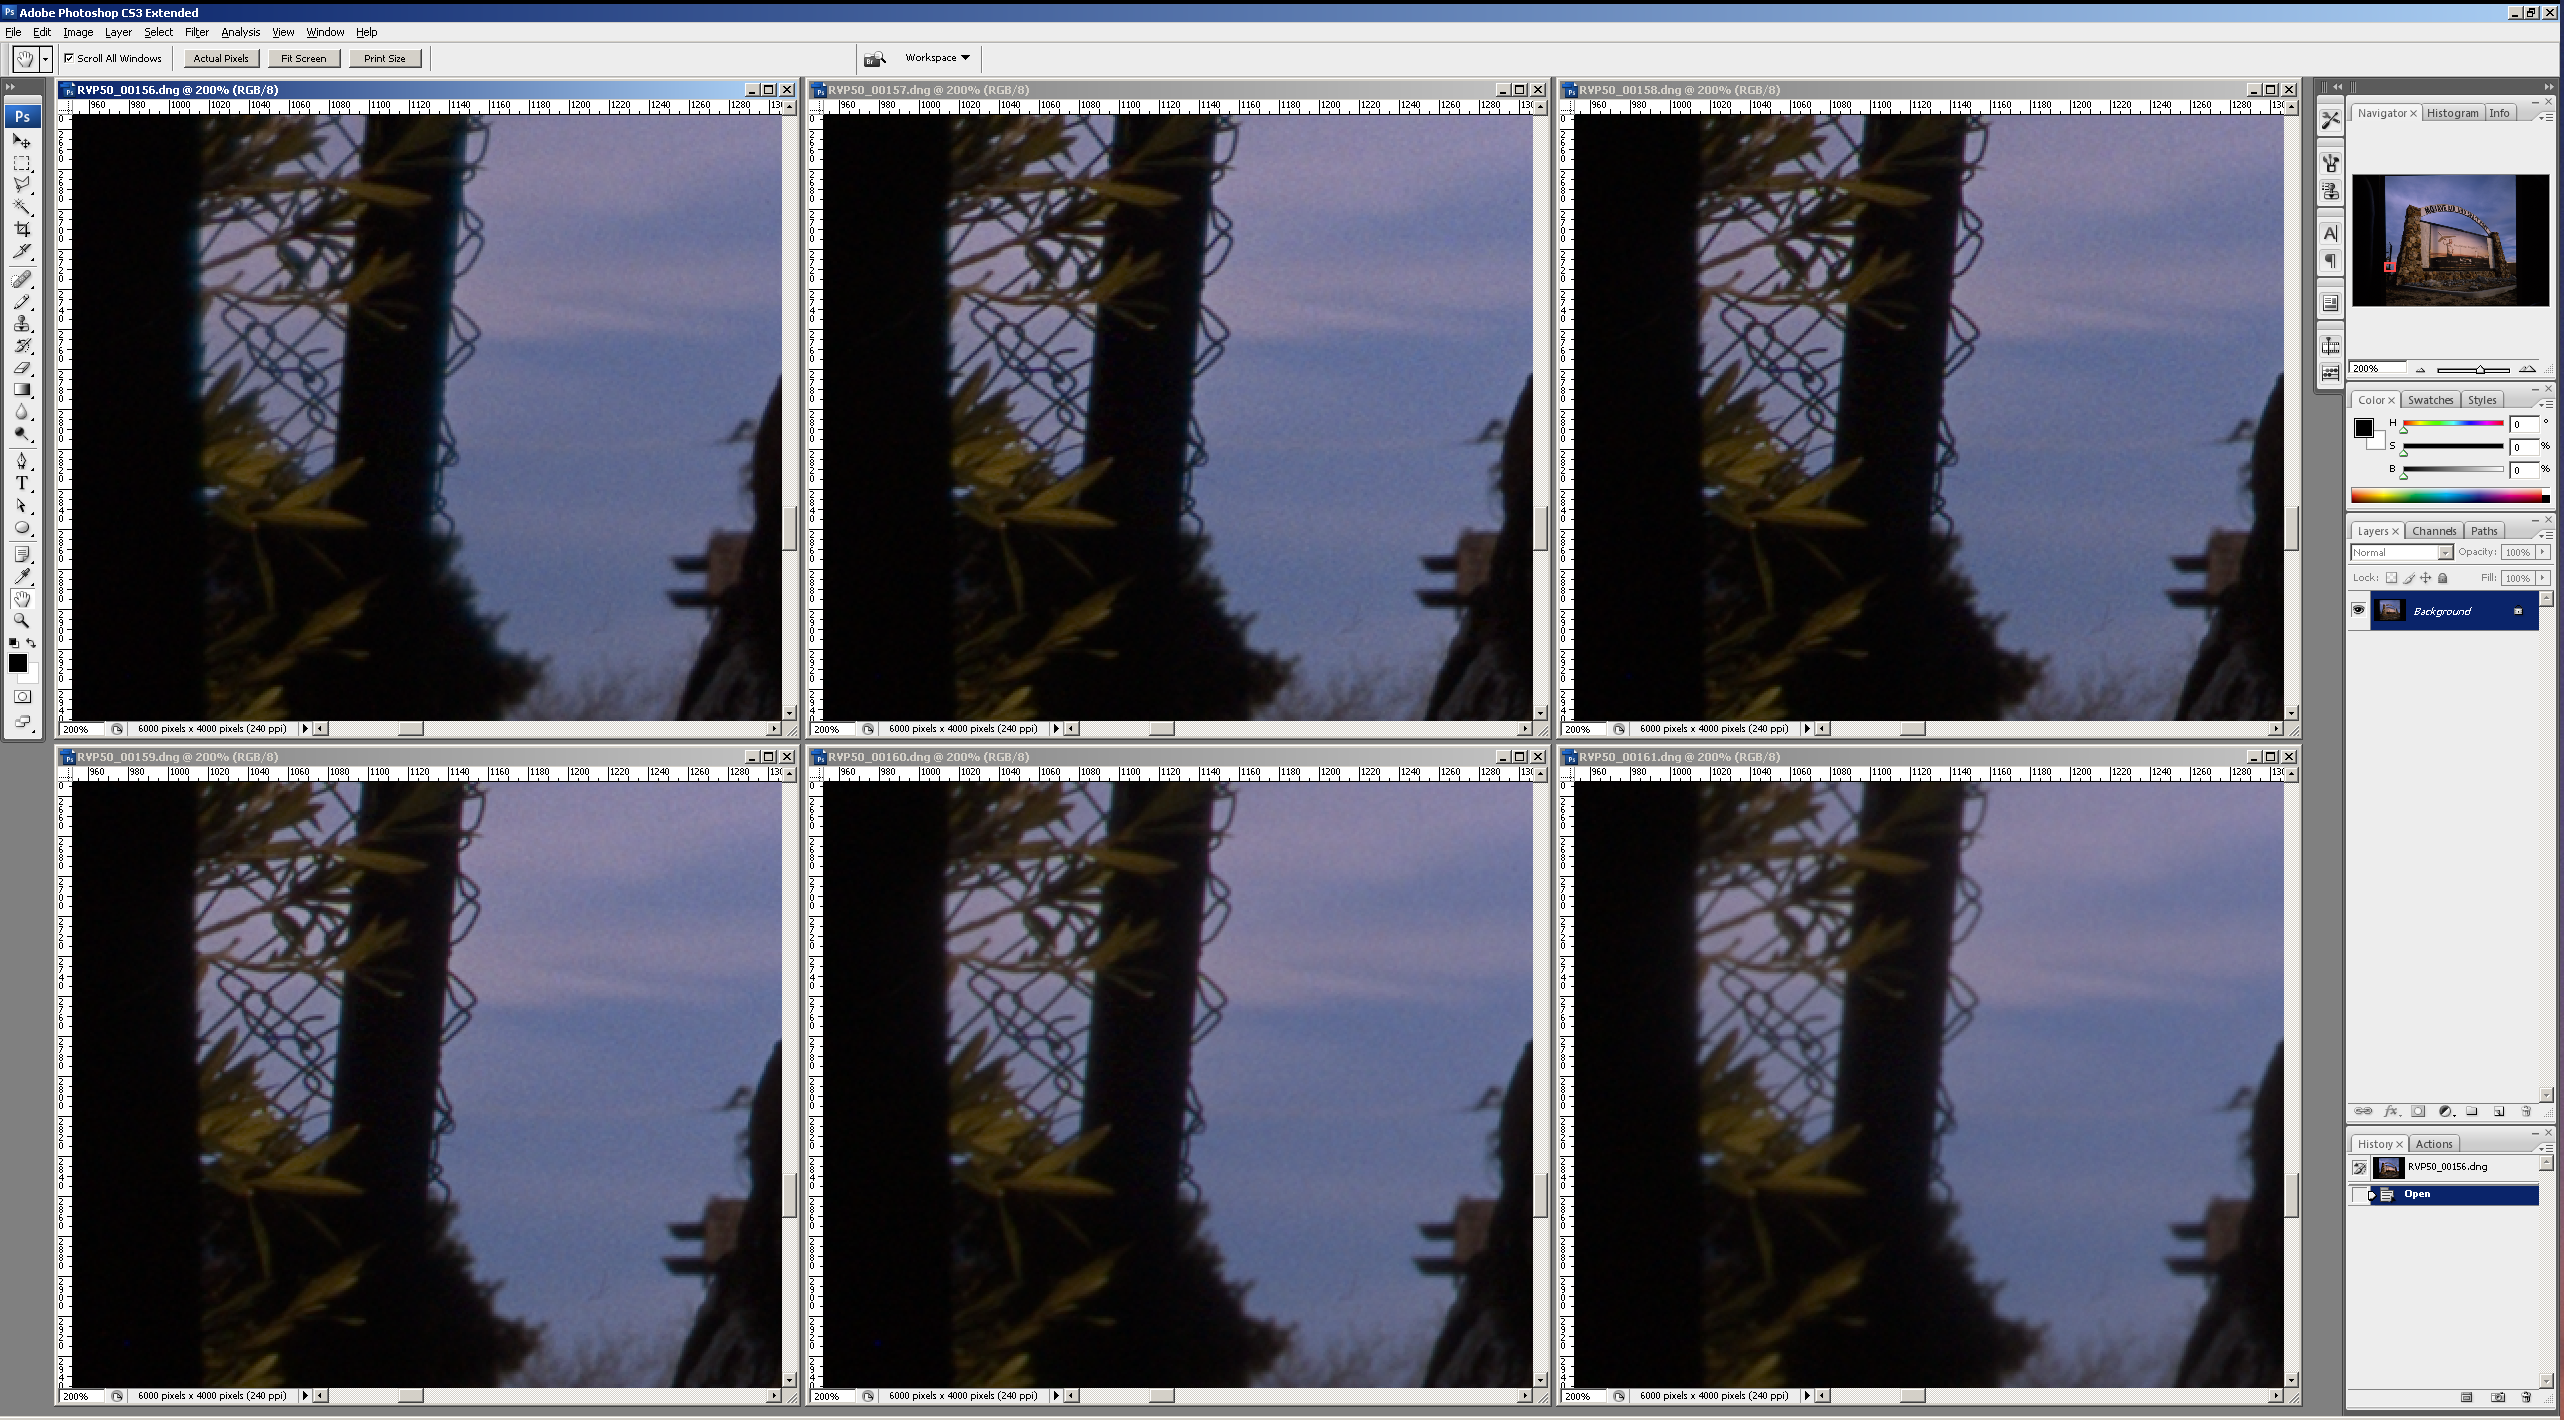
I think f/5.6 looks the best so let’s pick that aperture.
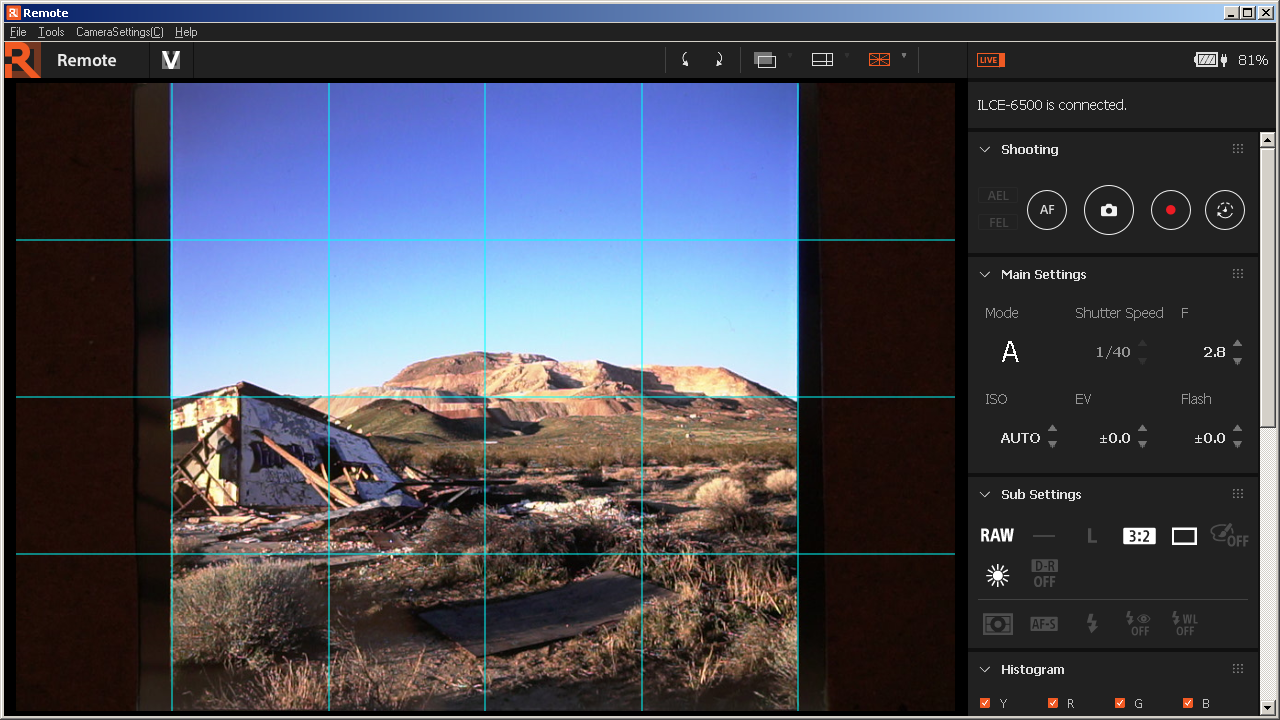
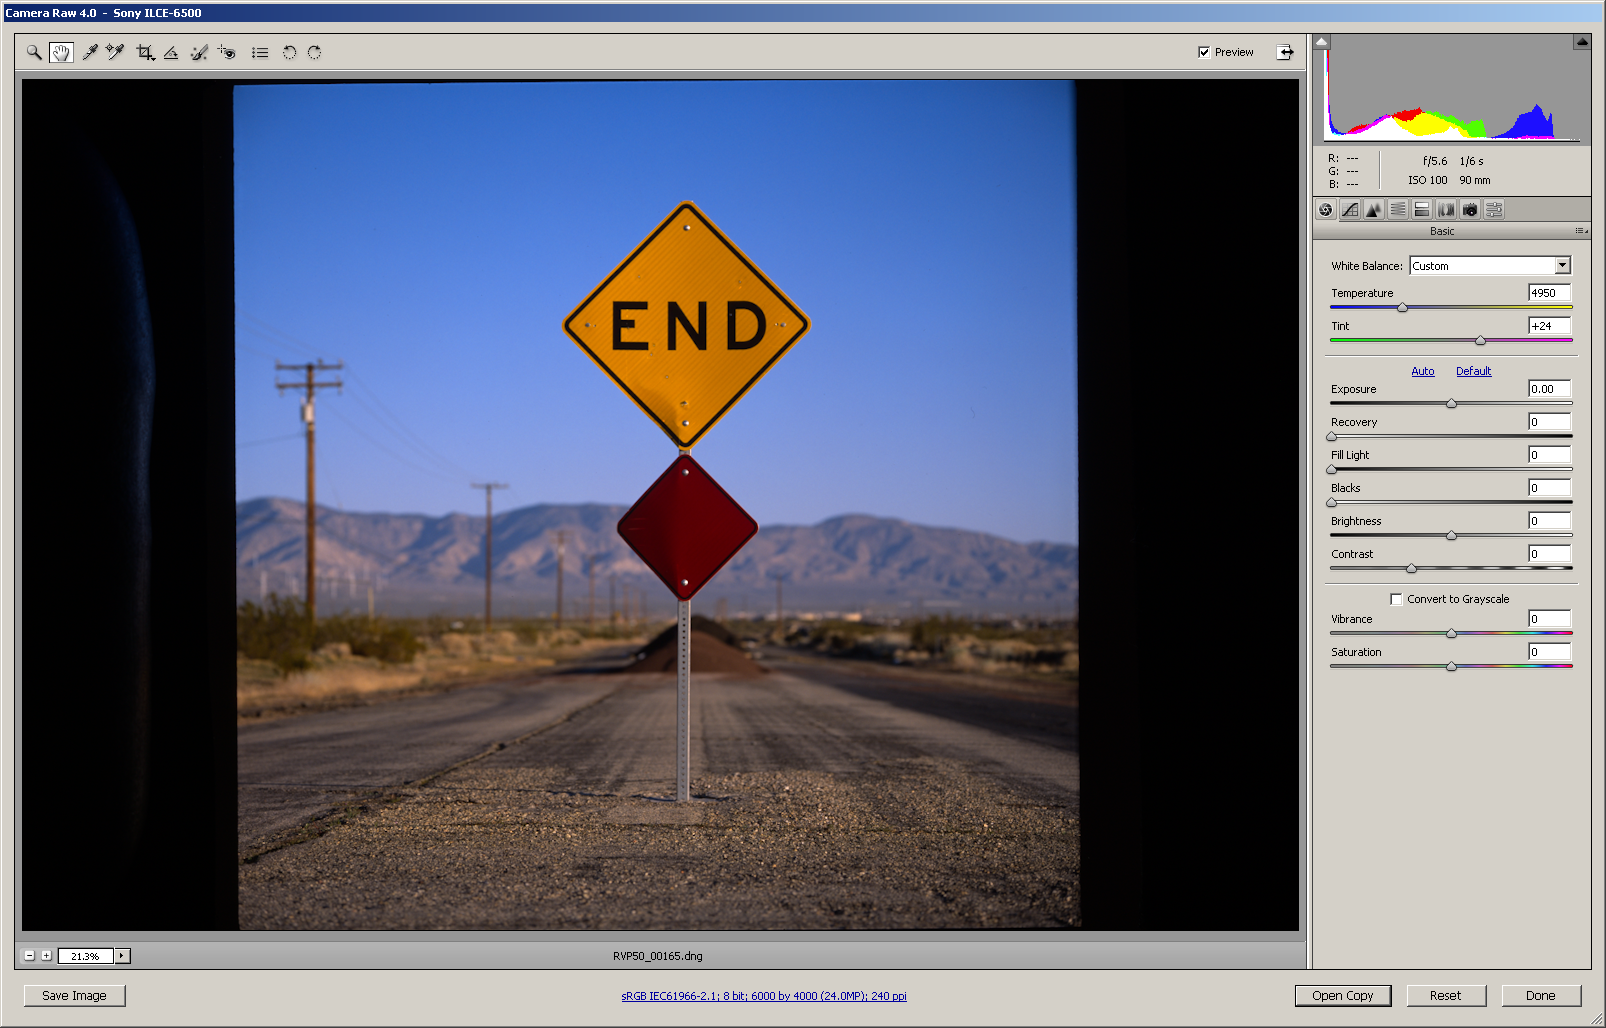
For shutter speed it’s a bit of artistic choice. I compared what I saw on the monitor to what the slide looked like on the light pad. It will also depend on the particular photo as you can compensate for over/under exposure in the scanning process.
I ended up using f/5.6 at 1/6 ISO 100 for 6x6 Fujifilm Velvia 50. Don’t forget that you will have to change the exposure for different formats as macro lenses get darker when focused to close distances.
Mess with the exposure slider in Camera Raw then set that difference on the shutter speed on the camera.
Camera Raw settings
This is also a bit of artistic choice but I found leaving everything as neutral as possible looked the best. Set all the sliders to zero as a base setting, and save that as a preset.
For image settings, generally you want to leave it at the base camera resolution. I turn it down a notch when scanning grainy film like Kodak Tri-X 35mm because the extra pixels aren’t getting you any more resolution.
To save disk space and processing time I usually leave it at 8-bit sRGB, you may want to set it to 16-bit if you take it straight into Photoshop and expect to do some heavy editing. Don’t use Adobe RGB or any other color spaces unless you can control everything all the way up to printing because any slip-up and your colors will look like crap.
You can also crop it here to square or whatever other format you may be shooting.
Tweaking
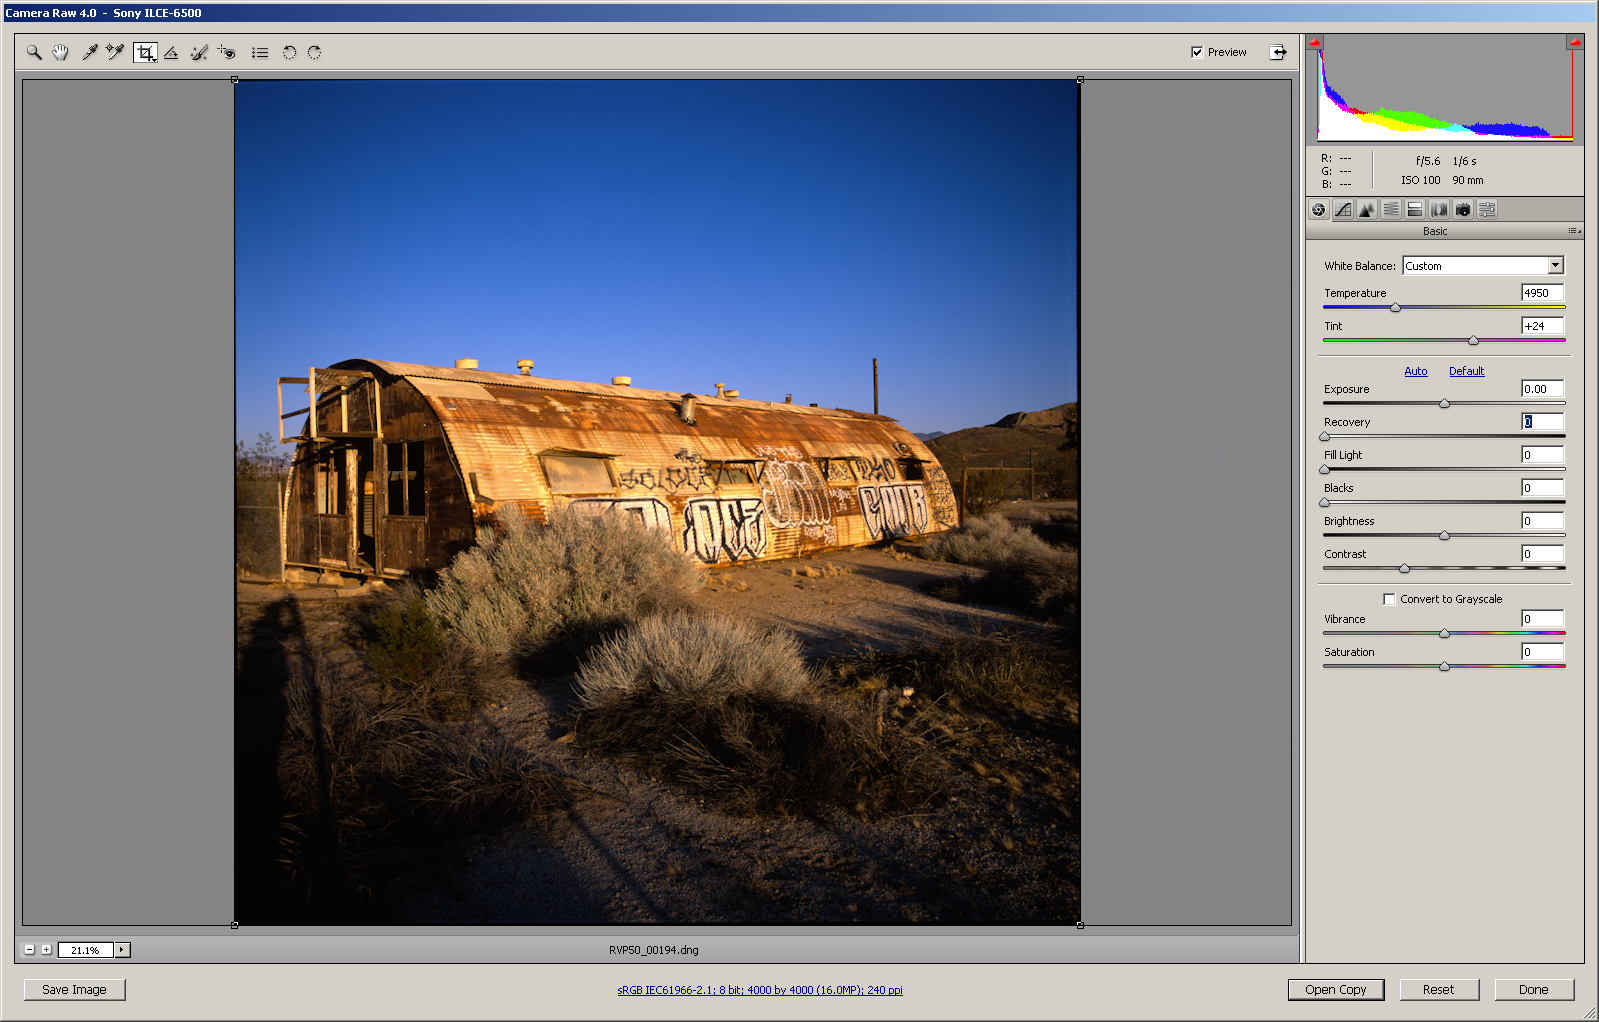
Really the only tweak I do in Camera Raw is the recovery slider. It will recover blown highlights that are overloading channels. Notice that the bright highlights on the hut are starting to turn glaring yellow and look like pizza cheese or something. There is also a colored triangle in the upper right of the histogram to let you know the highlights are overloaded.
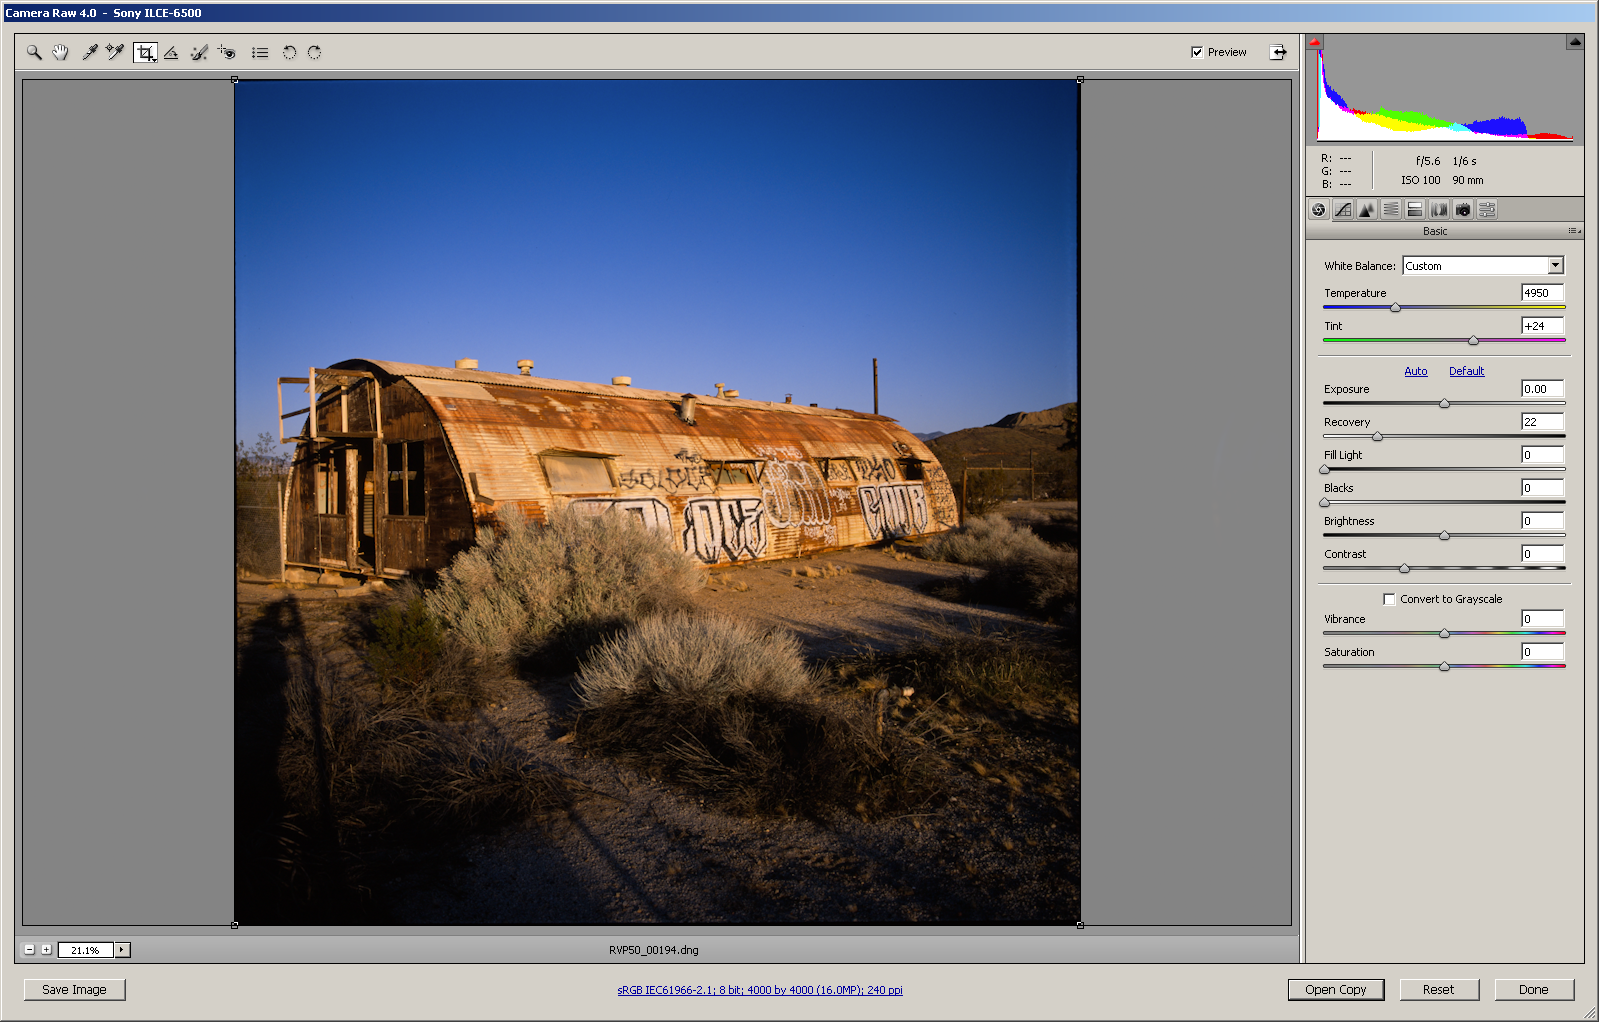
Add a bit on the recovery slider to fix these highlights. Don’t use too much or your picture may end up looking dull and flat. If you find yourself adding too much, speed up the shutter speed on your camera to reduce the exposure and try the scan again, instead of trying to fix it in Camera Raw.
B&W negative
This guide has been for color slide film, which is probably the easiest to scan even though it has a reputation for being hard to shoot. For black and white negative the process is the same except you will need to reduce your exposure as B&W negative is much ‘thinner’. You can also do the inversion here by going to the curves tab. Flip the end points to the opposite side to invert it. You probably also want to add a curve to make things look more natural, here’s a sample of a curve I used.
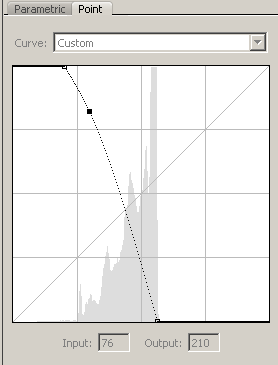
This is also artistic choice so play around with it until you get something you like. Since negative film is much more forgiving of misexposure you’ll probably need to tweak the curve for each shot.
Color negative
I have shot very little color negative. You can scan it this way too, but you will need to do the color inversion yourself. Photoshop has some curves presets for this, but I found it pretty difficult. I know there are programs out there dedicated to the color negative inversion process. You might try them out but I have no advice there since I’ve never used them.
Lab scans
I used to have my film lab scan all my slides. They were fine, but I didn’t like the lack of control over how it looked (unless I took my film back to the lab for rescanning). If you decide to use lab scans with slide film, at least ask them to not do any color correction. If you’re shooting with filters they’ll probably color correct the filters right out!
It’s much more of a pain but I’ve found the advantages of home scanning to be:
- Control over alignment. Instead of having to rotate in Photoshop (with the loss of sharpness), I can rotate the film physically in scanning and correct for any tilt.
- Control over exposure. Any wrong exposure and I can make it look just like I want, instead of relying on what the lab tech thought was right.
- Better colors. I’ve seen many lab scanners flatten the colors and really lose the subtleties.
- Cheaper! Home scanning is free, and you probably already have a suitable camera. Of course you will have to decide for yourself if the time is worth it.
Comparison
So here’s a comparison between a lab scan and a home scan of the same slide.
Lab
Home scan

Your opinion may vary but while the lab scan has better resolution and is sharper, the home scan is properly aligned, has better shadow detail, better color, and doesn’t crop off the edges.
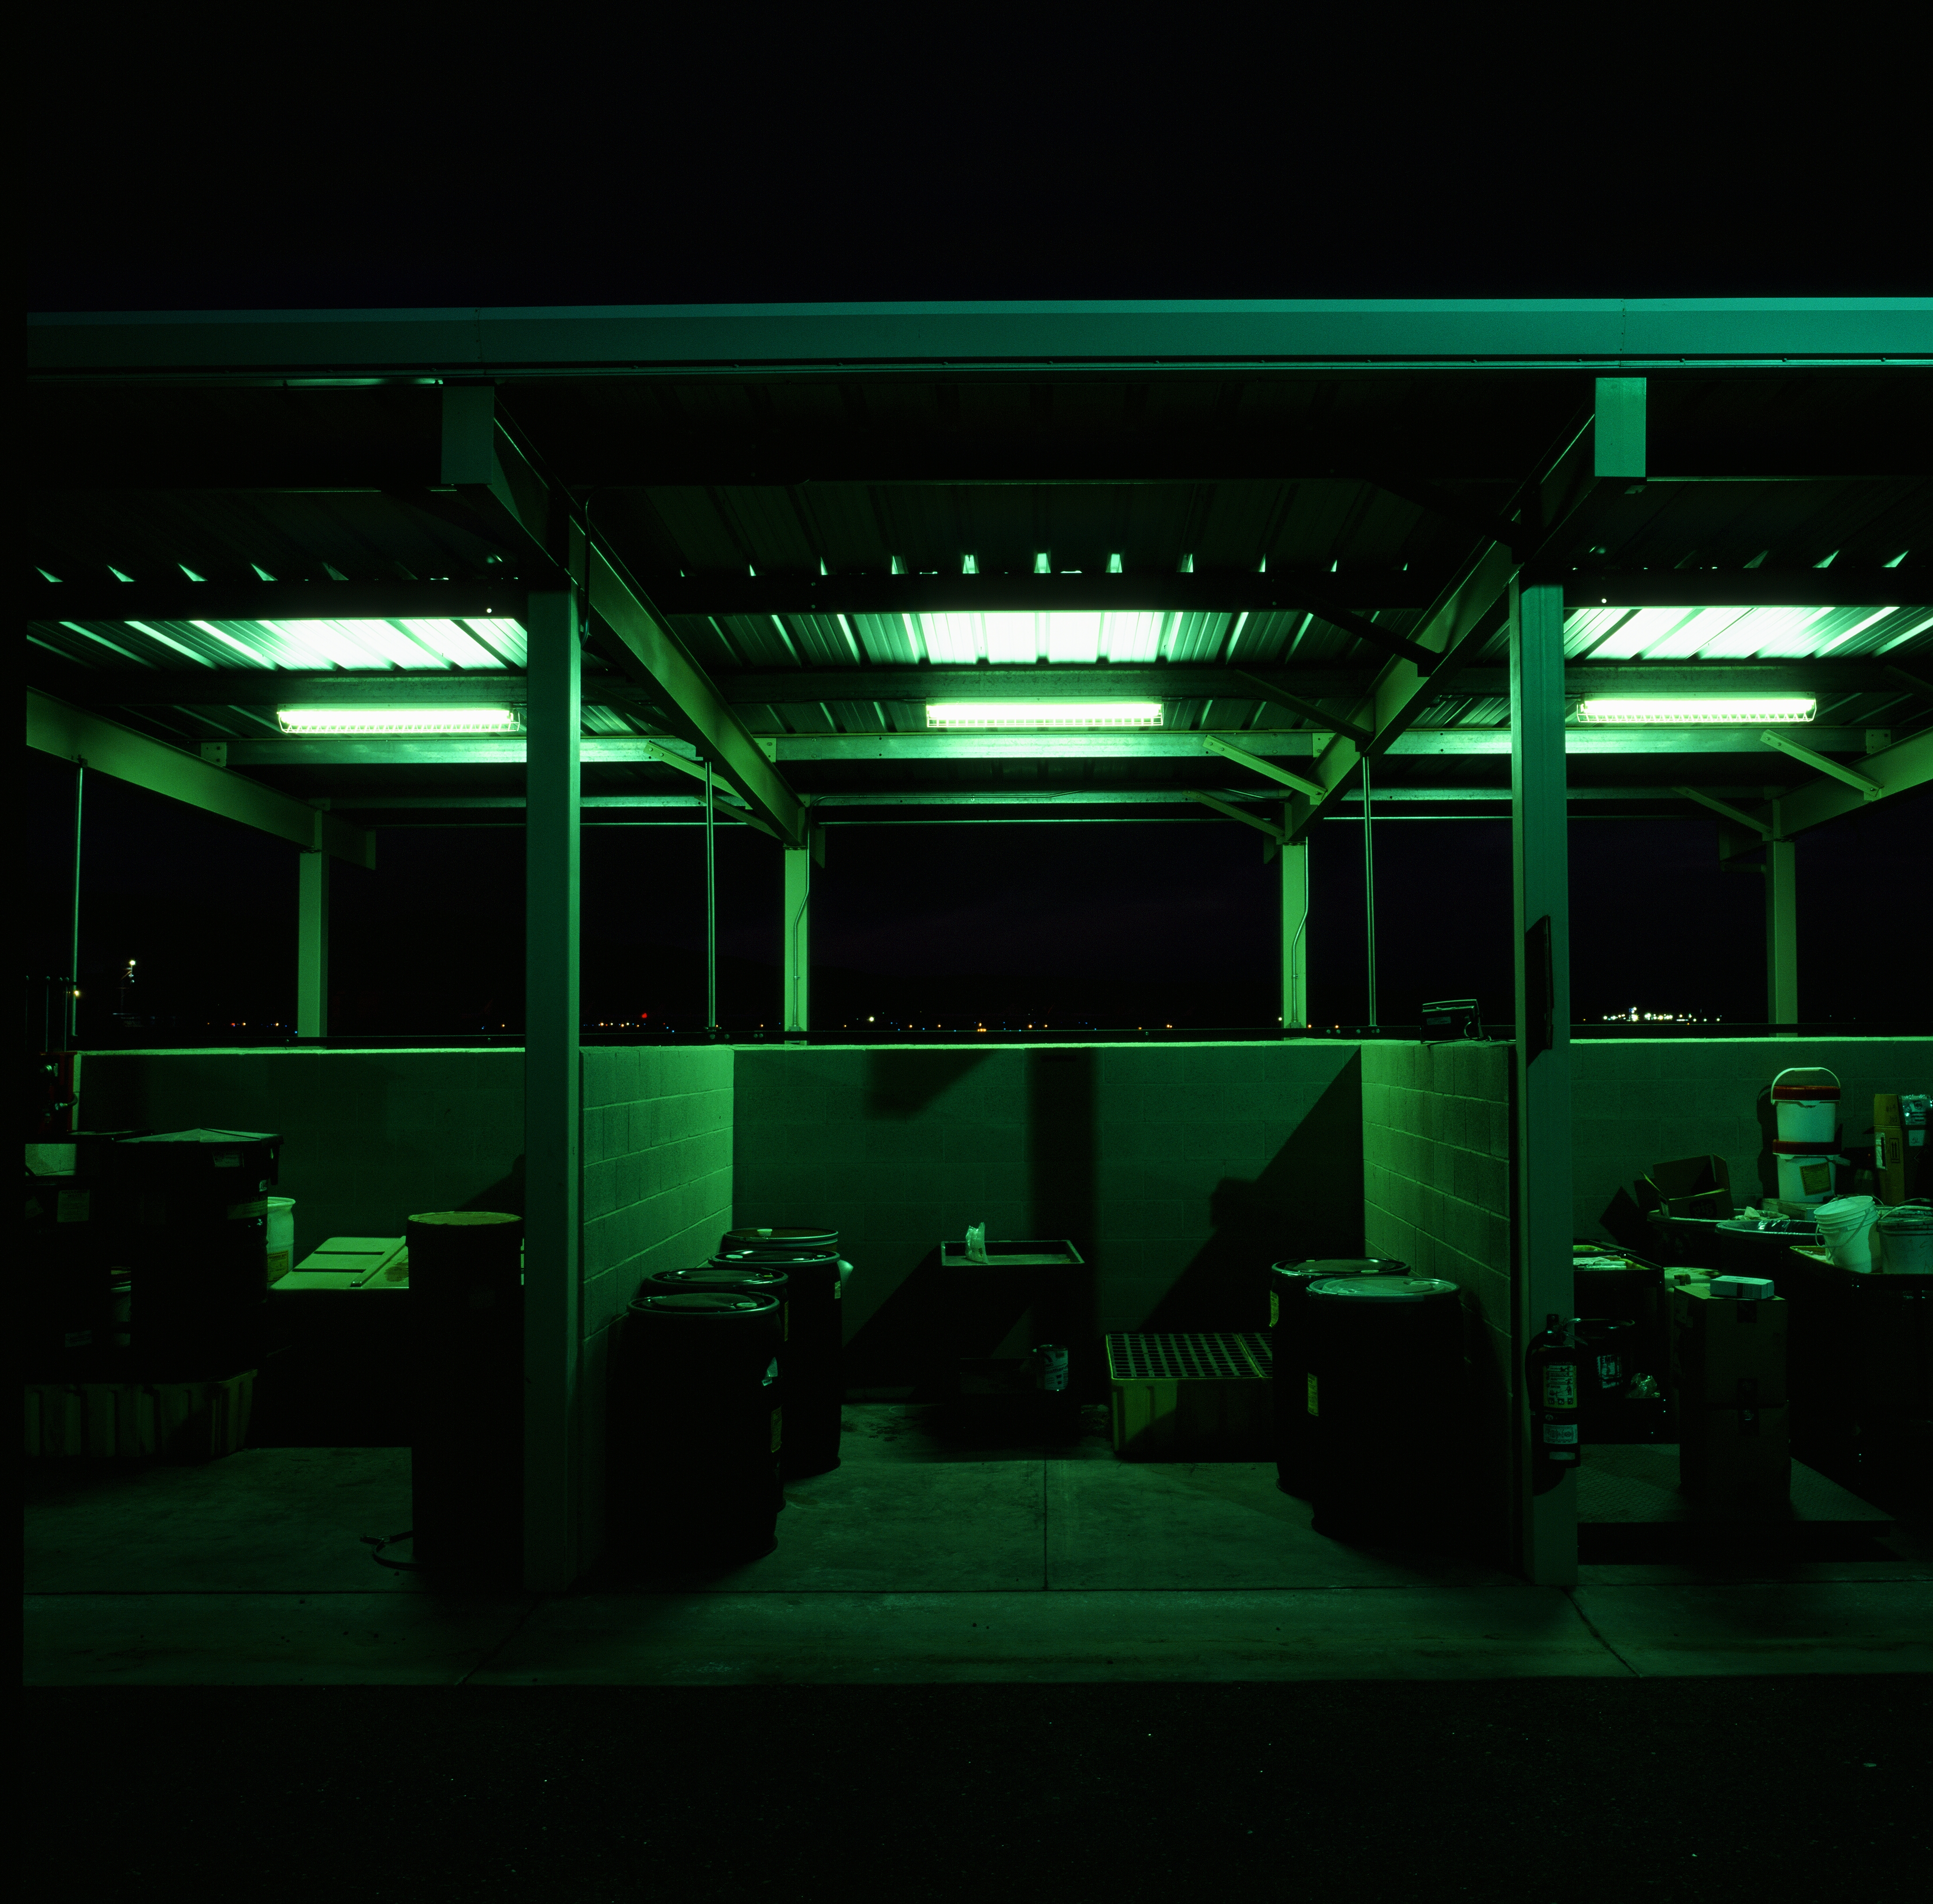
35mm home scan
All the previous scans have been for 120 medium format film, if you want to see what kind of resolution you can get, here’s a full unedited scan of 135 Fujifilm Provia 100F at 24 megapixels:

Happy scanning!
Comments